1) Create a new Fusion Web Application (ADF) Application and Provide an Application Name, GetCreditRating and click Next

2)
 From the Project Technologies move Web Services into the Selected box. Accept the defaults and click Finish.
 3) Right-click the Model project and select New and In the Gallery select Web Services –> Web Service Data Control then click OK.
 4) Provide a name GetCreditRatingDC and give the URL endpoint for the Web Service, then click Next.
5) Select the web service operation you want to use for the ADF application. In my example my web service only has one operation.
 6) Click Finish, Save your work, the Web service data control is now been created.
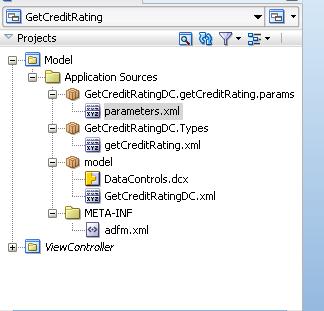
 Next Step is to create the UI components.
1) Right-click the ViewController project and select New and In the Gallery select JSF --> JSF Page and Click OK

2) Provide a name for the jsp page, GetCreditRating, Also ensure that the ‘Create as XML Document (*.jspx) check box is checked. I have selected the page template, Oracle Three Column Layout but you can create a layout of your choice.

3) I only want 2 facets so I delete the last facet right-clicking the right had panel and selecting Delete

4) In this example I want to get the creditRating of the customer based on the customer ID. So I will enter a Customer ID and Submit it to get the response from web service.
5) Drag the fields you require from the web service data control to the left pannel. In my example I only require the Customer ID. When you drag to the panel select Text –>ADF Input Text w/Label.
 6) In this example I want to get the Credit Rating of the customer based on the customer ID. So Once I enter the customerID I want to execute the request. To do this I need a button.
Drag the getCreditRating(Object) under the fields created in step 5. Select Methods –> ADF Button.


7) To Display the credit Rating i will use ADF Output w/Label. so drag the Object from web service data control and select Text –>ADF Output w/Label.

8) Now it is time to test, Right-click the GetCreditRating.jspx page and select Run

9) A browser should start, test for both valid and invalid values.


